看漫画学Python
前置
- 容器类可以存储任意类型的数据
- 方法属于类;函数可以直接调用
break语句强行退出循环体,不再执行循环体中剩余的语句- 短路设计
- 与 一False全False
- 或 一True全True
- 会不计算后面的表达式
- set 集合
- add(elem)
- remove(elem)
- clear()
字符串
- string 字符串
- 普通字符串
- 原始字符串
r - 长字符串(还是需要转义)
- 转义符
- \t 水平制表符
- \n 换行
- \r 回车
- 默认下,int()函数将字符串参数当作十进制数字进行转换
- format() 格式化字符串
s字符串d十进制整数f十进制浮点数g十进制整数或浮点数o八进制整数x十六进制整数
- 字符串查找
find()返回索引 - 字符串替换
replace(old, new[, count])
函数
-
函数的可变参数
- *可变参数在函数中被组装成一个元组
1
2
3
4
5
6
7
def sum(*numbers):
total = 0.0
for number in numbers:
total += number
return total
print(sum(100.0, 20.0, 30.0)) # 150.0
print(sum(30.0, 80.0)) # 110.0- **可变参数在函数中被组装成一个字典
1
2
3
4
5
6
7
8
9
10
11
def show_info(**info):
for key, value in info.items():
print(f"{key} -- {value}")
show_info(name= "Ben", age = 18, sex = True)
show_info(student_name = "Ben", student_no = 1)
# name -- Ben
# age -- 18
# sex -- True
# student_name -- Ben
# student_no -- 1 -
global x修改成全局变量 -
过滤函数
filter(function, iterable)- 返回值不是列表,需要用
list() - 条件判断
-
映射函数
map(function, iterable)- 返回值不是列表,需要用
list() - 操作变换
-
匿名函数
lambda 参数列表: lambda体
1
2
3
4
5
6
7
8
9
10
11
12
13
14
15
16
17
18
19
20
21
22
23
'''
lamdba函数
'''
def calc(opr):
if opr == "+":
return lambda a, b: (a + b)
else:
return lambda a, b: (a - b)
f1 = calc('+')
f2 = calc('-')
print(f"10 + 5 = {f1(10, 5)}")
print(f"10 - 5 = {f2(10, 5)}")
data1 = [66, 15, 91, 28, 98, 50, 7, 80, 99]
filtered = filter(lambda x: (x > 50), data1)
data2 = list(filtered)
print(data2)
mapped = map(lambda x: (x * 2), data1)
data3 = list(mapped)
print(data3)
类与对象
- 类
-
成员变量
- 实例变量
1
def __init__(self···):
- 类变量 理解为通用数据即可
-
成员方法
- 实例方法
1
def function(self···):
- 类方法
- @修饰函数、方法和类
def function(cls,···):
-
构造方法
__init__() -
属性
-
- 私有变量
- 前面加上
__双下划线 - 默认类的变量是公有的,可以在类的外部访问
- 前面加上
- 私有方法 前面加上
__双下划线 - get(取值)和set(赋值)函数来访问私有变量
1 | # get(取值)和set(赋值)函数来访问私有变量 |
- 继承 父类 只有公有的成员变量和方法才可以被继承
super().__init__()初始化父类成员变量- 多继承 继承多个父类
- 方法重写 子类的方法会重写Override父类的同名方法
- 封装 继承 多态
异常处理
try-excepttry代码块发生异常执行except代码块
1 | try: |
- 无论try代码块执不执行,finally代码块都会执行
raise引发异常
内置函数
- datetime库
- datetime类
datetime.datetime(year, month, day, hour=0, minute=0, second=0, microsecond=0, tzinfo=None)构造datetime类datetime.today()返回当前的本地日期和时间datetime.now(tz=None)返回指定时区的当前日期和时间(tz设置时区)datetime.fromtimestamp(timestamp, tz=None)返回与UNIX时间戳对应的本地日期和时间(单位是秒)
- date类
datetime.date(year, month, day)构造date类date.today()返回当前的本地日期date.fromtimestamp(timestamp)返回与UNIX时间戳对应的本地日期
- time类
datetime.time(hour=0, minute=0, second=0, microsecond=0, tzinfo=None)构造time类
- timedelta
- 计算时间跨度
datetime.timedelta(days=0, seconds=0, microseconds=0, milliseconds=0, minutes=0, hours=0, weeks=0)构造timedelta类
strftime(format)日期时间对象转字符串- %m 两位月份表示
- %y 两位年份表示
- %Y 四位年份表示
- %d 两位表示月中的一天
- %H 两位小时表示(24小时制)
- %I 两位小时表示(12小时制)
- %p AM或PM区域性设置
- %M 两位分钟表示
- %S 两位秒表示
- %f 以六位数表示微秒
- %z +HHMM或-HHMM形式的UTC偏移
- %Z 时区名称
strptime(format)字符串转日期时间对象
- datetime类
- re正则表达式
re.match(p, text)返回一个·Match匹配对象,否则返回Nonere.search(p, text)返回第一个匹配对象,否则返回Nonere.findall(p, text)返回所有匹配字符串列表,,否则返回Nonere.sub(pattern, repl, string, count=0)字符串替换- pattern 正则表达式
- repl 替换的新字符串
- string 被替换的旧字符串
- count 替换的最大数量,默认为零
re.split(pattern, string, maxsplit=0)字符串分割- pattern 正则表达式
- string 分割的字符串
- maxsplit最大分割次数,默认为零
open(file, mode=‘r’, encoding=None, errors=None)打开文件- file 要打开的文件
- mode 文件打开模式
- t 文本文件模式
- b 二进制文件模式
- r 只读模式
- w 只写模式
- x 独占创建模式(文件不存在则创建;文件存在则FileExistsError异常)
- a 追加模式(文件不存在则创建,文件存在则末尾追加)
-
- 更新读写模式(必须与r、w或a组合使用)
- encoding 打开文件的文件编码,默认是UTF编码
- errors 指定文本文件发生编码错误时如何处理
close()关闭文件with open(filename) as file:自动释放资源(关闭文件)- filename 文件名
- file 打开的文件对象
- 读写文本文件(或二进制文件)
read(size=-1)size限制读取的字符数,size=-1对读取的字符数没有限制readline(size=-1)返回单行字符串,size限制读取的字符数readlines()读取文件到一个字符串列表,每一行数据都是列表的一个元素write(s)将字符串s写入文件并返回写入的字符数writelines(lines)向文件中写入一个字符串列表(每一行末尾都提供分隔符)flush()刷新写缓冲区,在文件没关闭的情况下将数据写入文件
⭐⭐图形用户界面
- 应用程序
- 窗口
- 面板
1 | ''' |
- 事件循环是一种事件或消息分发处理机制,大部分GUI在界面的现实及相应用户事件的处理都是通过主事件循环实现的
- 自定义窗口类
1 | import wx |
- 在窗口中添加控件(面板Panel和静态文本StaticText)
1 | import wx |
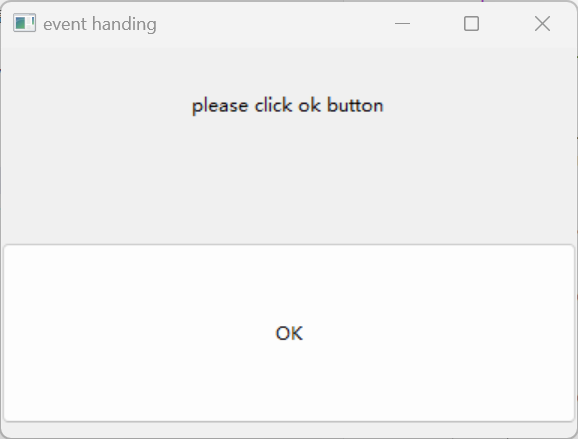
- 事件处理
- 事件源(控件)
- 事件
- 事件处理程序
1 | import wx |
- 布局管理
-
创建对象
wx.BoxSizer(wx.HORIZONTAL)创建水平方向盒子对象wx.BoxSizer(wx.VERTICAL)创建垂直方向盒子对象- 默认是水平方向
-
添加到父窗口
Add(window, proportion=0, flag=0, border=0)添加到父窗口- proportion 设置当前占父窗口的空间比例
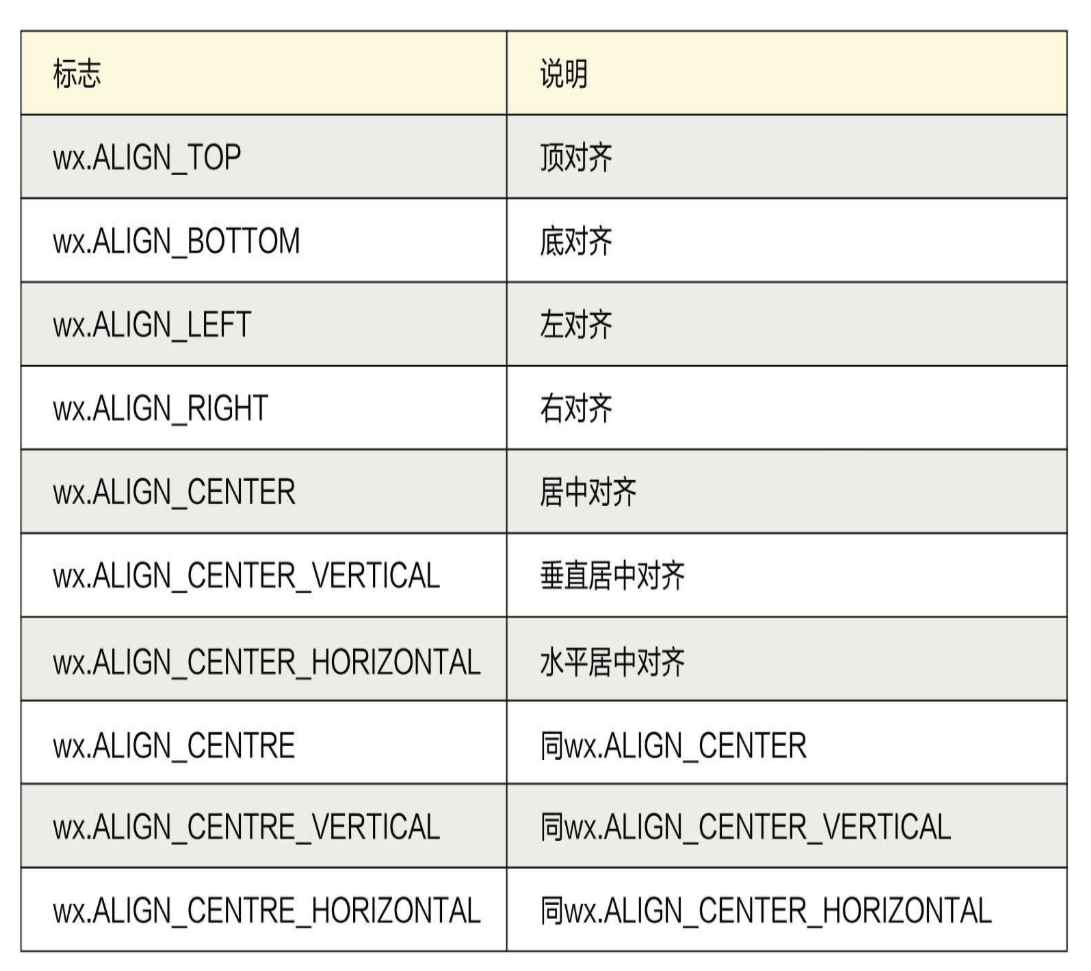
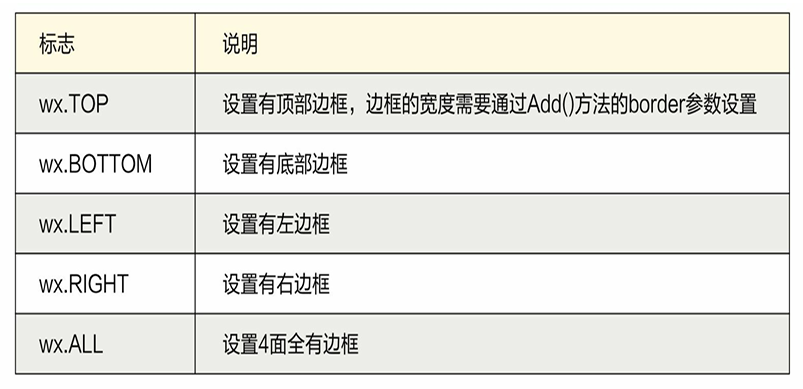
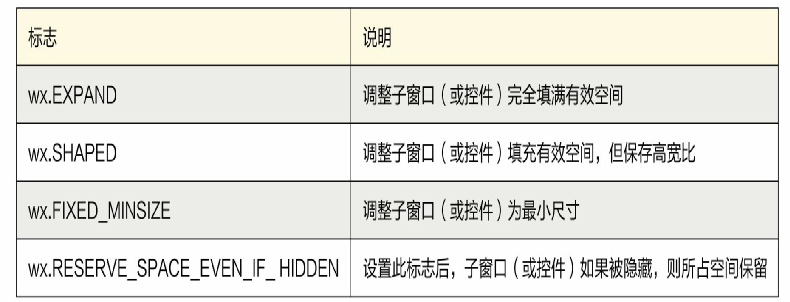
- flag 布局标志(对齐、边框、调整尺寸)

- border 边框宽度
-
1 | import wx |
- 控件
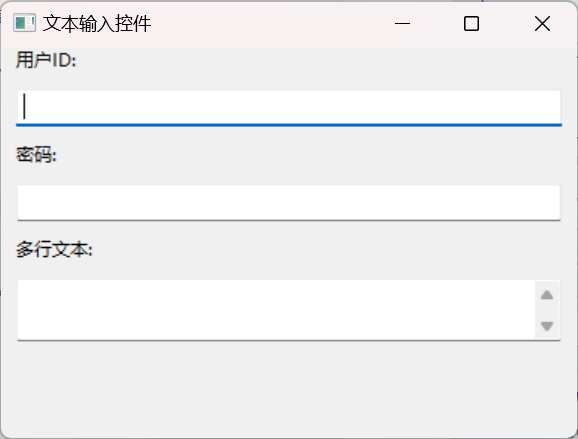
- wx.TextCtrl() 文本输入控件
wx.TextCtrl(panel)wx.TextCtrl(panel, style=wx.TE_PASSWORD)wx.TextCtrl(panel, style=wx.TE_MULTILINE)
1 | import wx |
- 复选框和单选按钮
1 | import wx |

- 列表
1 | import wx |
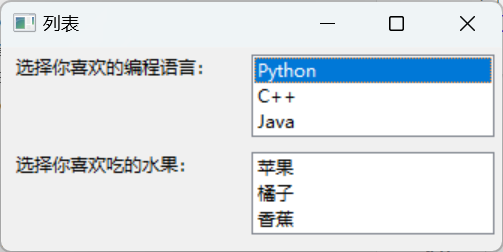
1 | import wx |

网络通信
1 | '''发送GET请求''' |
1 | '''发送POST请求''' |
- JSON(JavaScript Object Notation)
- JSON文档
- JSON对象
- JSON数组
- 下载文件
1 | '''下载文件''' |
- JSON对象解码——字典
- JSON数组解码——列表
访问数据库
- 数据类型
- INTEGER 有符号的整数类型
- REAL 浮点类型
- TEXT 字符串类型(UTF-8、UTF-16)
- BLOB 二进制大对象类型,能够存放任意二进制数据
- Python数据类型与SQLite数据类型的映射
| Python数据类型 | SQLite数据类型 |
|---|---|
| None | NULL |
| int | INTEGER |
| float | REAL |
| str | TEXT |
| bytes | BLOB |
- 数据库连接对象Connection
- connect(database) 打开数据库连接,database是数据库的文件路径
- close() 关闭数据库连接
- commit() 提交数据库事务
- rollback() 回滚数据库事务
- cursor() 获得Cursor游标对象
- 游标cursor操作
- execute(sql[, parameters]) 执行一条SQL语句
- execute(sql[, seq_of_params]) 执行批量SQL语句
- fetchone() 从结果中返回只有一条记录的序列
- fetchmany(size=cursor.arraysize) 从结果中返回小于等于size记录数的序列
- fetchall() 从结果集中返回所有数据
多线程
-
线程模块——threading
active_count()返回当前处于活动状态的线程个数current_thread()返回当前的线程对象main_thread()返回主线程对象Thread(target=None, name=None,args=())创建线程Thread对象- target参数指向线程体函数
- name参数可以设置线程名
- args是为线程体函数提供的参数
- 有休眠和没有休眠的区别
-
自定义线程函数
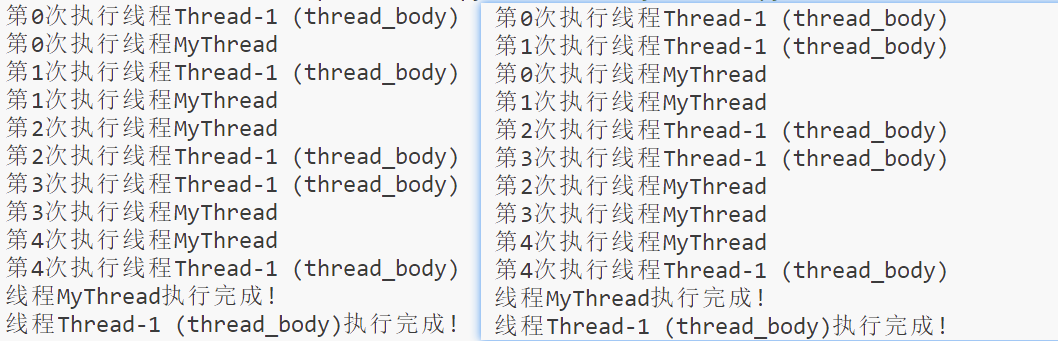
1 | import threading |
- 自定义线程类
1 | import threading |
- 线程管理
- 线程创建
- 线程启动
- 线程休眠
- 等待线程结束
- 线程停止
- 等待线程结束
join(timeout=None) timeout用于设置超时时间
1 | import threading |
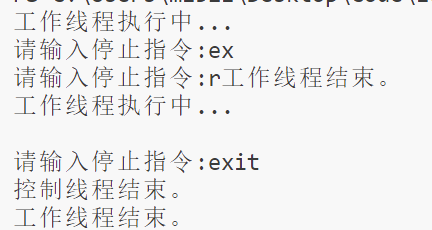
- 线程停止
1 | import threading |